
Cricut Quilt Blocks Tutorial: Make an Autumn Tints Quilt Block Using Cricut Maker
- Jul 21, 2024
- 6 min read
Updated: Aug 29, 2025
Cricut and Easy Quilt Blocks
In my last post, hopefully I got you thinking about using your Cricut for doing more than cutting vinyl and cardstock where we made an easy rail fence quilt block using Cricut Maker to cut the fabric.
As I said before, Cricut can help you make lots of quilt blocks easier, faster, and more accurately.
If you missed it, you can read about how to make a Cricut friendly 6" rail fence quilt block.
Now that you've seen it, let's get going on making another easy quilt block.
This time, I'm going to show you how to make a 6" Autumn Tints Quilt Block using Cricut. To make it, we're going to need a few different sizes of squares.
Contrasting colors really make this block stand out, but you can use any colors you like.
Once Cricut cuts the squares, we'll use them to make a 6 1/2" (6" finished) Autumn Tints quilt block.
Materials Needed
(1) piece of fabric approximately 8" wide x 4" long.
(1) piece of fabric approximately 9" wide x 3" long.
(2) pieces of fabric approximately 5" wide x 3" long.
Cricut pink fabric mat (I'm using 12"x12", but 12"x24" will work, too)
Cricut rotary blade
Cricut Maker
Sewing machine (I'm using a machine, but feel free to hand piece them if you prefer)
Thread
Iron
Cricut Design Space Setup
Once you've launched Cricut Design Space, click on the green "New Project" button in the upper right of the page. The Canvas will open.
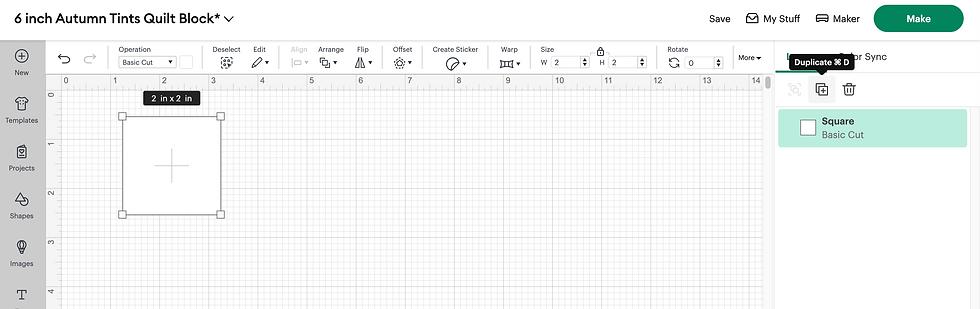
Click on the "Shapes" option on the left of the page. On my screen, it is the 4th option from the top on the lefthand side of the page. Then, click on the square shape.

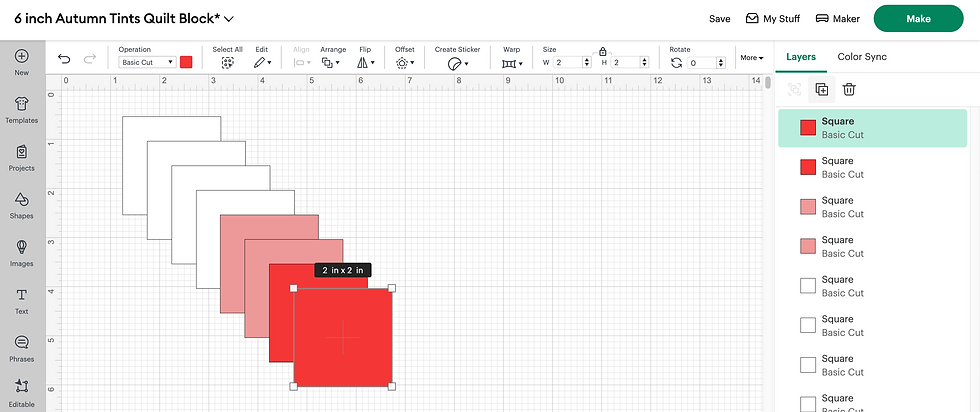
We need 2" squares. Conveniently for us, Cricut Design Space automatically adds a 2" square in this case.

It added them in as black, so I clicked on the black square to the right of the Operation drop down box and changed the color to white since I need 4 of them.
Separating them into colors will also help keep them organized for cutting. Cricut will cut each color separately
Now, click on "Duplicate" 3 times which will result in 4 white squares. If you know the command, you can also use copy and paste.

Next, you need to cut 4 more squares of the same size, but in a different fabric color. Cut
2 of them in 1 color, then the remaining 2 in another color.
Make sure the last square is selected. Click on Duplicate", then change the color. I changed mine to light pink.
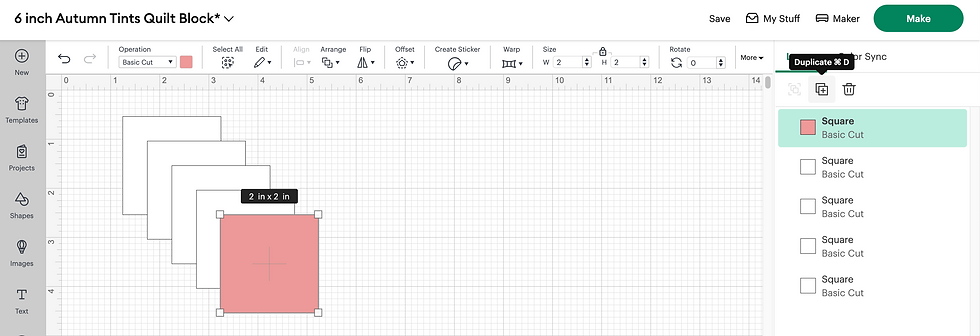
Duplicate it again to get the other square.

Now, repeat it for the other fabric. Duplicate the last square, then change its color. You can see I duplicated the last light pink square, then changed the color to the darker pink.
Now you have a total of (8) 2" squares.
Next, you need (2) 3 1/2" squares.
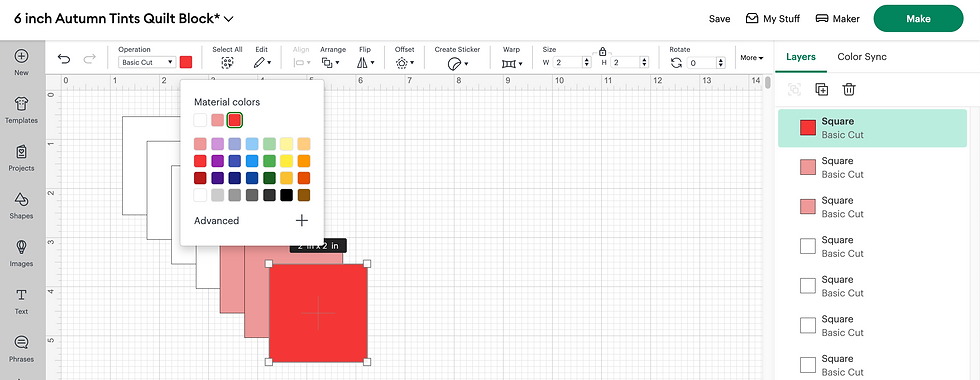
Open the"Shapes"panel and click on the square shape again. Then, go up to the top of the page and change the "Size" to 3.5".

Since the padlock icon is closed or in a locked position, it keeps the dimensions as a square. Change the color so Cricut separates it and puts in on a different mat for cutting. I changed mine to a darker red.
Finally, duplicate the 3.5"square since you need 2 of them.
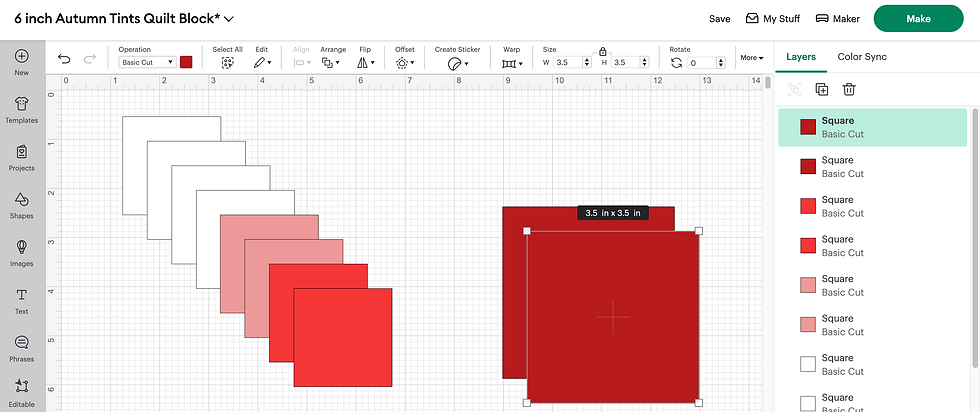
Now you have all the squares you need.
You'll want to save your project so you can easily find it again later. I saved my project to "6 inch Autumn Tints Quilt Block".
At this point, click on the green "Make" button at the top right of the page.
Cricut will open to the next screen where you'll notice that Cricut has automatically organized everything into separate colors.

Cutting Fabric with Cricut
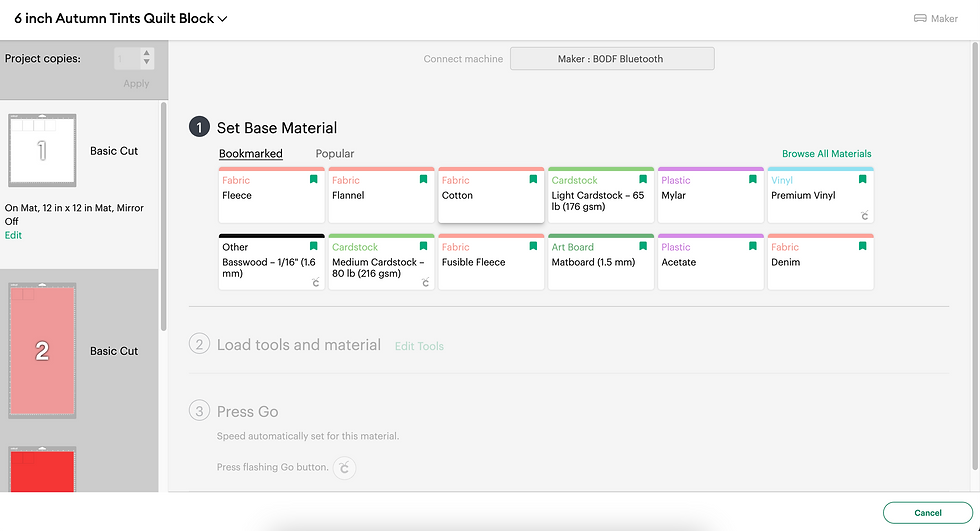
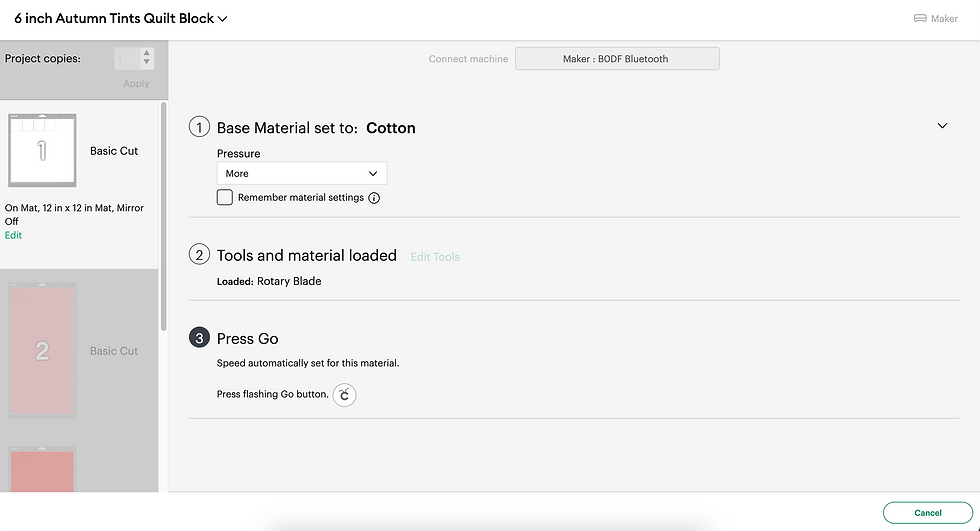
Check the mat size and change it if needed.
Sometimes Cricut will select a mat size different than what I want to use. I'm used a 12"x12" Cricut pink fabric grip mat. The "Material Size" option is 12 in. x 12 in. in this case. If you're using a 12 in. x 24 in. mat, then you'll use that option.
Once you click on the green "Continue" button, you set the Base Material option to "Cotton". This is Step 1 in the following image.
I'll be honest here, I often set the machine to cut with more pressure since, even with a new blade, it doesn't always give me the clean cut I'm looking for.
Another confession...I don't always use cotton here in this case either. Shhhh. Don't tell anyone, but I've been known to use the "Denim" setting. I find I get much cleaner cuts this way on quilting cotton. Should you do this? Up to you. Your mileage may vary. Just saying.
Now it's time to put the fabric on the pink Cricut Fabric Mat. Place the fabric you've chosen with the right side facing down onto the mat.

Make sure the fabric edges align with the top and left edges of the mat and smooth it down. A brayer is a nice thing to have for this, but of course, your hands work just fine, too, if you don't have a brayer.
Make sure your Cricut Maker has the rotary blade loaded. Once you've got the fabric on the mat, press the "Load/Unload" button. It's the button below the power button. (See Step 2 below.)
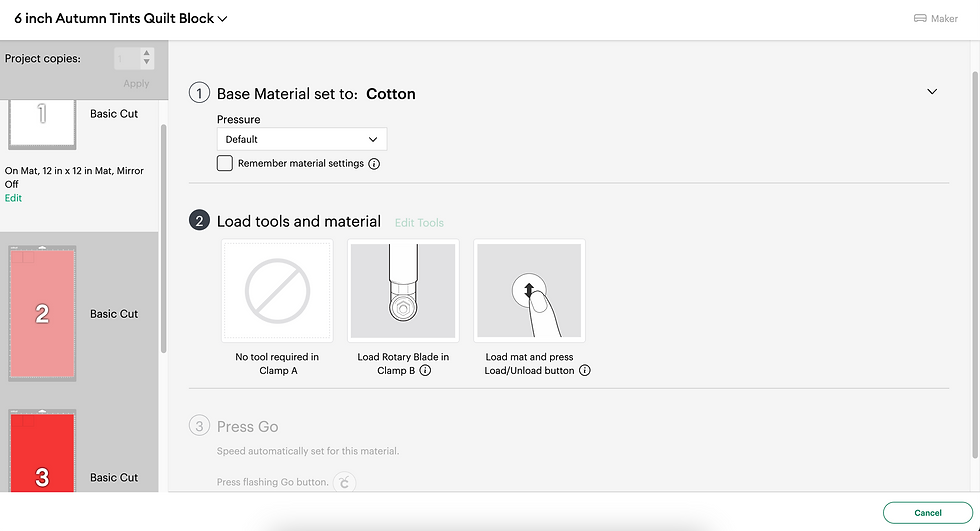
If you're not sure how to do this, just look at the Cricut software. It tends to prompt you on what to do next.
When Cricut is ready, the "Go" button will start flashing. (You'll recognize it as the button with the Cricut symbol on it in Step 3 below.)
When the "Go" button starts flashing, press it, then Cricut will cut your fabric.
Once Cricut has finished cutting, press the "Load/Unload" button you pressed earlier to unload your mat.
Carefully remove the cut squares and put them aside. Continue to load the remaining pieces of fabric in the machine until all pieces of fabric are cut.
When you're finished cutting, you should have a total of (8) 2" squares.
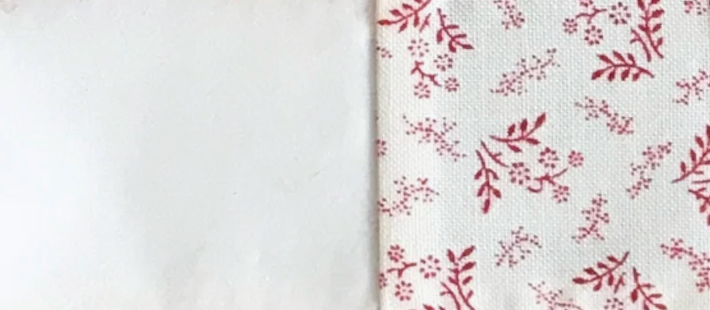
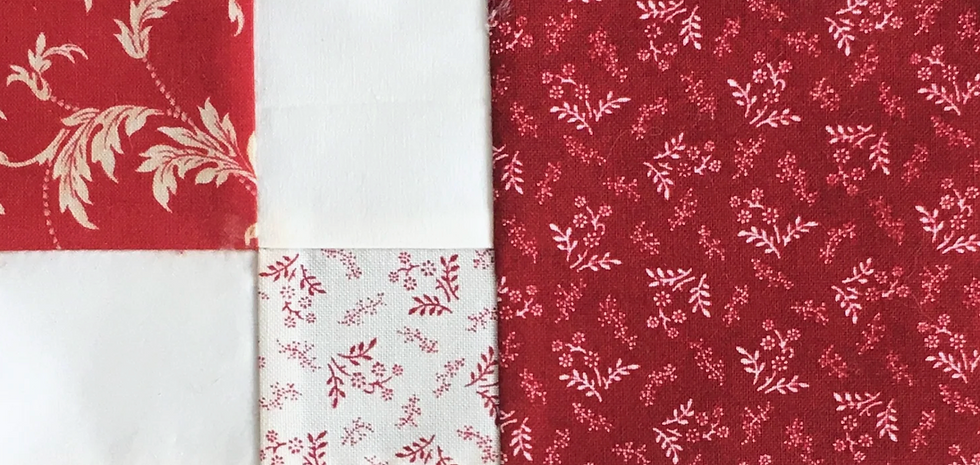
In my case, I cut (4) white 2" squares, (2) white with red print 2" squares, (2) red with white print 2" squares, and (2) dark red with white print 3 1/2" squares.
Assembling the Autumn Tints Block
Now the fun part.....sewing!
Using a 1/4" seam, we'll put (2) of the 2" squares together. I pressed the seam to set it, then pressed it toward the red print, or darker, fabric.

Now, repeat with 2 other squares.
Again, I pressed to set the seam, then pressed toward the white/red print square. This will make it easy to nest the seams when sewing the block together.
To see how to properly nest seams, see my 9 patch block tutorial.
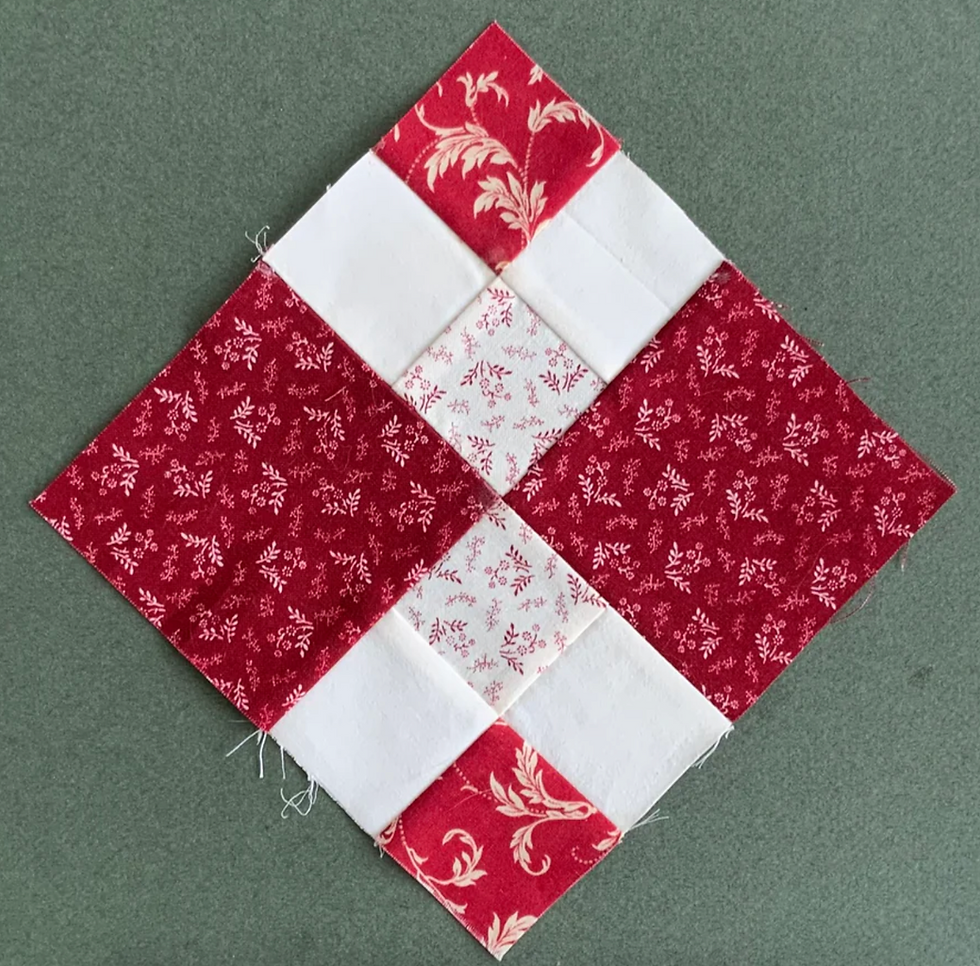
Now that you have 2 units, make a 4 patch block out of them.

Then repeat so that you have (2) 4 patch blocks. Set them aside.
Then, take a 3 1/2" block and attach it to one of the 4 patch blocks.
Press the seam flat, then press toward the larger block. At this point, the unit should be 6 1/2" wide and 3 1/2" in length.
Repeat with the remaining 3 1/2" block.

Join the 2 units together using a 1/4" seam to complete the Autumn Tints quilt block.
You should be able to see that it's really a variation of a bigger 4 patch block.
Using Cricut helps so much in accuracy when cutting blocks.
In the photo, my block appears distorted or uneven, especially on the left side. No worries. It isn't. Unfortunately, my block isn't pressed completely flat which makes it look distorted on the one side since it's not flat against the surface.
I did choose to press the last seam open in this case.
You should now have a 6 1/2" x 6 1/2" Autumn Tints quilt block.
And that's my take on a 6 1/2" Cricut Friendly quick and easy Autumn Tints quilt block.
I love the rich red colors in this block.
Your turn!
Show me what your block looks like.
Until next time, my Quilty friends,
Wendy
Comments